For all injection moulding projects at HLH, designing and positioning pins to minimize their effect on your parts is an essential part of our Design For Manufacturing (DFM) process. While our engineer typically determine pin placement, customers get to sign off on pin locations before an order is finalised. This can be an important decision, as ejector pin marks can not only affect the aesthetics but also the part’s form, fit and functionality.
In this article, gain a better understanding of what ejector pin marks are, what causes them, and how to minimize them on your product’s surface.
Ejector pin marks (or ejector marks) are visible imprints or blemishes—typically circle, oval or elongated—left on the surface of moulded parts during the injection moulding process. These marks are typically created by ejector pins that extend into the mould cavity after it opens and play a critical role in safely and efficiently pushing the part out of the mould.
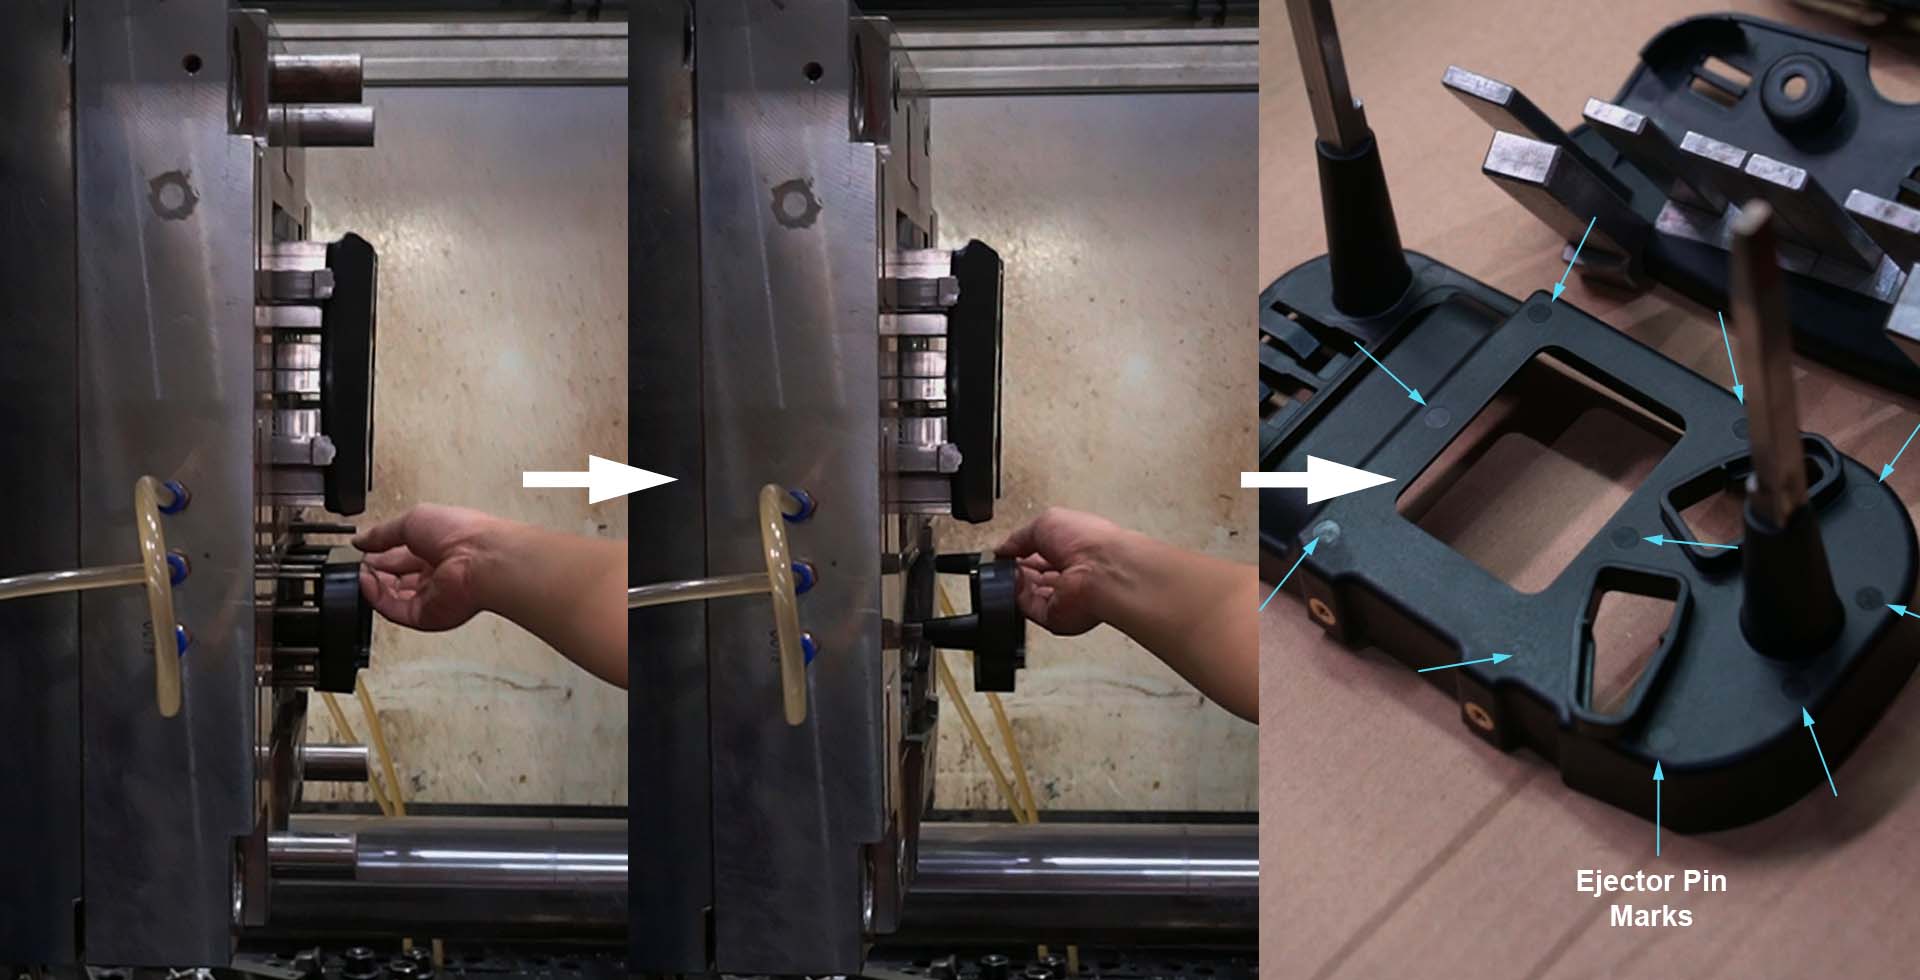
Ejector marks typically only affect the appearance of a part and are mostly harmless. However, if located in critical areas like sealing surfaces and areas exposed to high stress, it can interfere with the part’s intended function and hinder assemblies or operation of moving components. It can also weaken the structural integrity of a part.
In many cases, it is not possible to completely eliminate ejector pin marks since ejector pins are essential for pushing the part out of the mold. However, they can be minimized. Here are some specific solutions:

T1 samples as quick as 2 weeks!
Ejector pin marks are a natural part of the injection molding process, and in many cases, they are harmless. Ejector marks are generally not a concern when:
(1) Located on a non-critical surface: An internal or hidden area where appearance or function are not affected.
(2) Shallow, unform marks: Minimal depth and size marks that do not weaken the part or create stress points.
(3) Away from sealing & mating areas: Does not interfere with tight seals or precise fits.
(4) Can be easily concealed: Can be masked by secondary processes like painting, texturing, or plating.
Tooling and injection moulding are very complex processes that require experience to get right. With HLH’s engineering team, you can expect quality and consistency throughout the process. To get started on your injection moulding process, simply submit your 3D CAD drawings to our site contact form along with your project details and we will get back with a rapid quote and thorough DFM prior to order.
Discover more guides to optimise your design for injection moulding:
How to Design Stronger Ribs for Injection Moulding
How to Design Bosses for Injection Moulding
Identifying Injection Moulding Defects and Solutions
Choosing a Gate Type for Injection Moulding