Stereolithography (SLA) is a mature and versatile additive manufacturing (AM) process that is capable of producing highly accurate isotropic parts with superior finish and excellent design feature resolution. These qualities make it ideal for creating intricate prototypes, cosmetic parts, concept model and master patterns.
To help achieve better part quality and a successful print, it is important that your 3D model meets a number of recommendations. This article offers a comprehensive guide to the best practices for SLA 3D printing. Discover the characteristics and capabilities of SLA, design guidelines, summary of best design practices and cost reduction tips.
SLA is one of the most widely used vat photopolymerization technologies. It uses an ultraviolet (UV) laser beam light source to selectively cure photosensitive liquid resins layer by layer into solid shapes.
Disadvantages of the SLA Process
Characteristics of SLA 3D Printing
| Maximum Build Size | 800 x 800 x 550 mm |
|---|---|
| Resolution | ±0.2mm |
| Dimensional Accuracy | ±0.2% (with a lower limit of ±0.127 mm) |
| Layer Height | 50-100 um |
| Materials | Generic, transparent, high performance, rigid and high temp resins |
| Surface Structure | Smooth structure |
| Support | Required |
Unsupported Walls
With SLA, unsupported walls (walls connected to the rest of the print on less than two sides) are at a high risk of warping or breaking off. To avoid this, such walls should be at least 0.8m-1.0mm thick and be designed with filleted bases to reduce stress concentrations along the joint.

Supported Walls
Supported walls (walls connected to the print on at least two sides) are at much lower risk of warping. To ensure successful print, they should be at least 0.5mm thick.

Overhangs
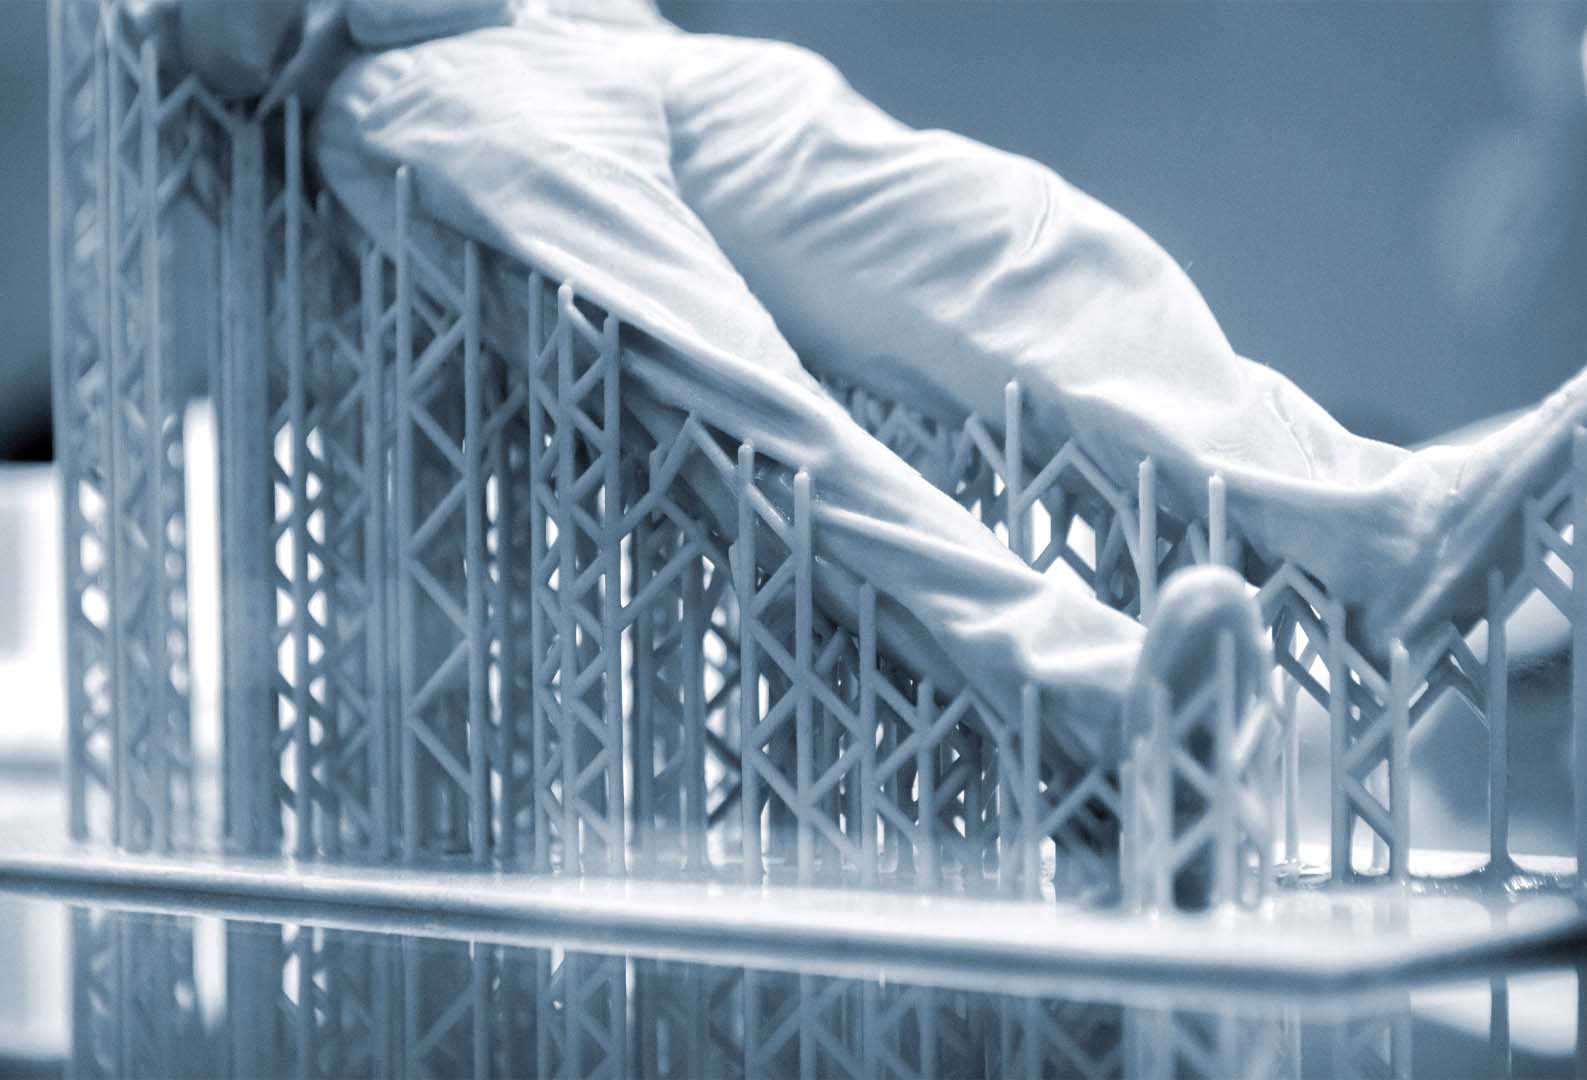
Overhanging features — extended or at an angle — in SLA designs always require support. Supports are the cornerstone of a successful SLA print. If it is necessary to print without supports, overhangs must be kept less than 1.0mm in length and at least 19° from level, but even then, there is a risk of warpage. It is, therefore, not recommended.

Holes
In SLA printing, holes that are too small may seal before the polymer is fully cured. To avoid this, holes should be at least 0.8mm in diameter.

Hollow Parts
For hollow designs, add drainage holes to the lowest area of your model to prevent uncured resin from accumulating and becoming trapped inside the finished part. This can lead to pressure imbalances within the hollow chamber and cause cracks, holes and even explosions. Drainage holes should be at least 3.5mm in diameter. To reduce the risk of print failure, keep the walls of hollow prints at least 2mm thick.
Slots
What size to design a slot is determined by the depth or thickness of the wall. We recommend a minimum slot size of 0.5mm, but the larger, the better — especially as wall thickness or depth increases.

Pins
Pins are tall thin features with a circular cross-sectional area. The diameter of a pin can be designed to 0.8mm, but even then, risk breaking. The minimum reliable pin diameter is 1mm.

Mating Parts
For SLA parts, adequate clearances must be designed between mating parts to prevent the assembly from turning into a single solid unit. To avoid this, models must be designed with a minimum clearance of 0.5mm.

Embossed Details
Embossed features must be designed using a minimum height, otherwise, it will not appear visible. It should be designed with a height of at least 0.3mm. To ensure embossed details come out nicely, make them larger than the indicated.

Engraved Details
If too small, such features, which are recessed into the model, are at risk closing up if not designed. Engraved details should be at least 0.5mm wide and 0.5mm deep.

Summary of SLA Best Design Practices
| Unsupported Walls | At least 0.8-1.0mm thick |
|---|---|
| Supported Walls | At least 0.5mm thick |
| Overhangs | Less than 1.0mm in length and at least 19° from level |
| Holes | Greater than of 0.8mm in diameter |
| Hollow Parts | Add drainage holes with minimum diameter of 3.5mm |
| Slots | At least 0.5mm (depends on wall thickness and depth) |
| Pins | At least 1mm (depends on pin height) |
| Mating Parts | At least 0.5mm apart |
| Embossed Details | Minimum embossed height of 0.3mm |
| Engraved Details | Minimum engraved height of 0.5mm and width of 0.5mm |
In this section, we outline some simple tips and tricks to help reduce the overall cost of your SLA part. In 3D printing, there are three main drivers of cost to bear in mind: material, printing time, and post processing time.
Explore our 3D printing services or discover more design guides like this below: