Bending is a fundamental process in sheet metal working that involves deforming a metal workpiece into a desired shape by applying force between two tools by a press brake: an upper tool (known as a punch) and a bottom tool (known as a V-die). Bending can improve a part’s structural integrity by increasing part stiffness, redistributing stress within a part, and help achieve specific shapes that are required for certain applications. For instance, shaping a curved profile can improve a part’s ability to withstand certain types of loads.

To fully utilize the capabilities of this process, it is important that your CAD is designed according to a number of recommendations. In this article, we offer a comprehensive guide to the best design practices for Sheet Metal Bending, tolerance guide and cost reduction tips.
The basic bending design guidelines that a designer needs to consider when modelling a sheet metal component include wall thickness, bend radii, and bend allowance.

1. Wall thickness
Sheet metal parts are usually fabricated from a single sheet of metal, so they should have a uniform wall thickness. Generally capabilities of of 0.9mm – 20mm in thickness are able to be manufactured from sheet (<3mm) or plate (>3mm) but this tolerance depends mainly on the part.
2. Bend radii
At a minimum, the smallest bend radius should be at least equal to the sheet thickness to avoid fractures or distortions in the metal part. Keeping bends in the same plane in the same direction helps to save time and money by preventing part reorientation. Keeping the bend radius consistent will also make parts more cost-effective.
3. Bend allowance
When you bend sheet metal, the neutral axis shifts toward the inside surface of the bend. The ‘K-factor’ is the ratio of the neutral axis location (t) to the material thickness (T), which can be used to to calculate the bend allowance. View the K-factor chart below to calculate the amount of material needed to account for your bend.
| Radius | Aluminium (Soft) | Aluminium (Medium) | Stainless Steel (Hard) |
| Air bending | |||
| 0 – t | 0.33 | 0.38 | 0.40 |
| t. – 3*t | 0.40 | 0.43 | 0.45 |
| 3*t. – >3*t. | 0.50 | 0.50 | 0.50 |
| Bottom bending | |||
| 0 – t. | 0.42 | 0.44 | 0.46 |
| t. – 3*t. | 0.46 | 0.47 | 0.48 |
| 3*t. – >3*t. | 0.50 | 0.50 | 0.50 |
| Coin bending | |||
| 0 – t. | 0.38 | 0.41 | 0.44 |
| t. – 3*t. | 0.44 | 0.46 | 0.47 |
| 3*t. – >3*t. | 0.50 | 0.50 | 0.50 |
Bend reliefs are two small cuts made in a piece of sheet metal to free up the metal between them. Although they are small features, leaving them out can cause stress to concentrate at the bend line, resulting in deformed holes and slots.
1. Bends close to an edge
If bend reliefs are left out for bends made close to an edge, it can cause unwanted tearing. In some cases, it can make your part un-manufacturable. To ensure successful bending, the width of the relief cuts should be at least equal to the material thickness, and the length should be longer than the radius of the bend.

2. Bends where the flanges aren’t adjoining
Flange in sheet metal parts, is a feature that consists of a face and bend connected to an existing face along a straight edge. For bends where the flanges aren’t adjoining, there are a number of different relief types available for utilisation by designers. Two of the most common types include:

Some components benefit from having special features formed from the remaining edges, two of these main features are curls and hems.
1. Curl edge guidelines
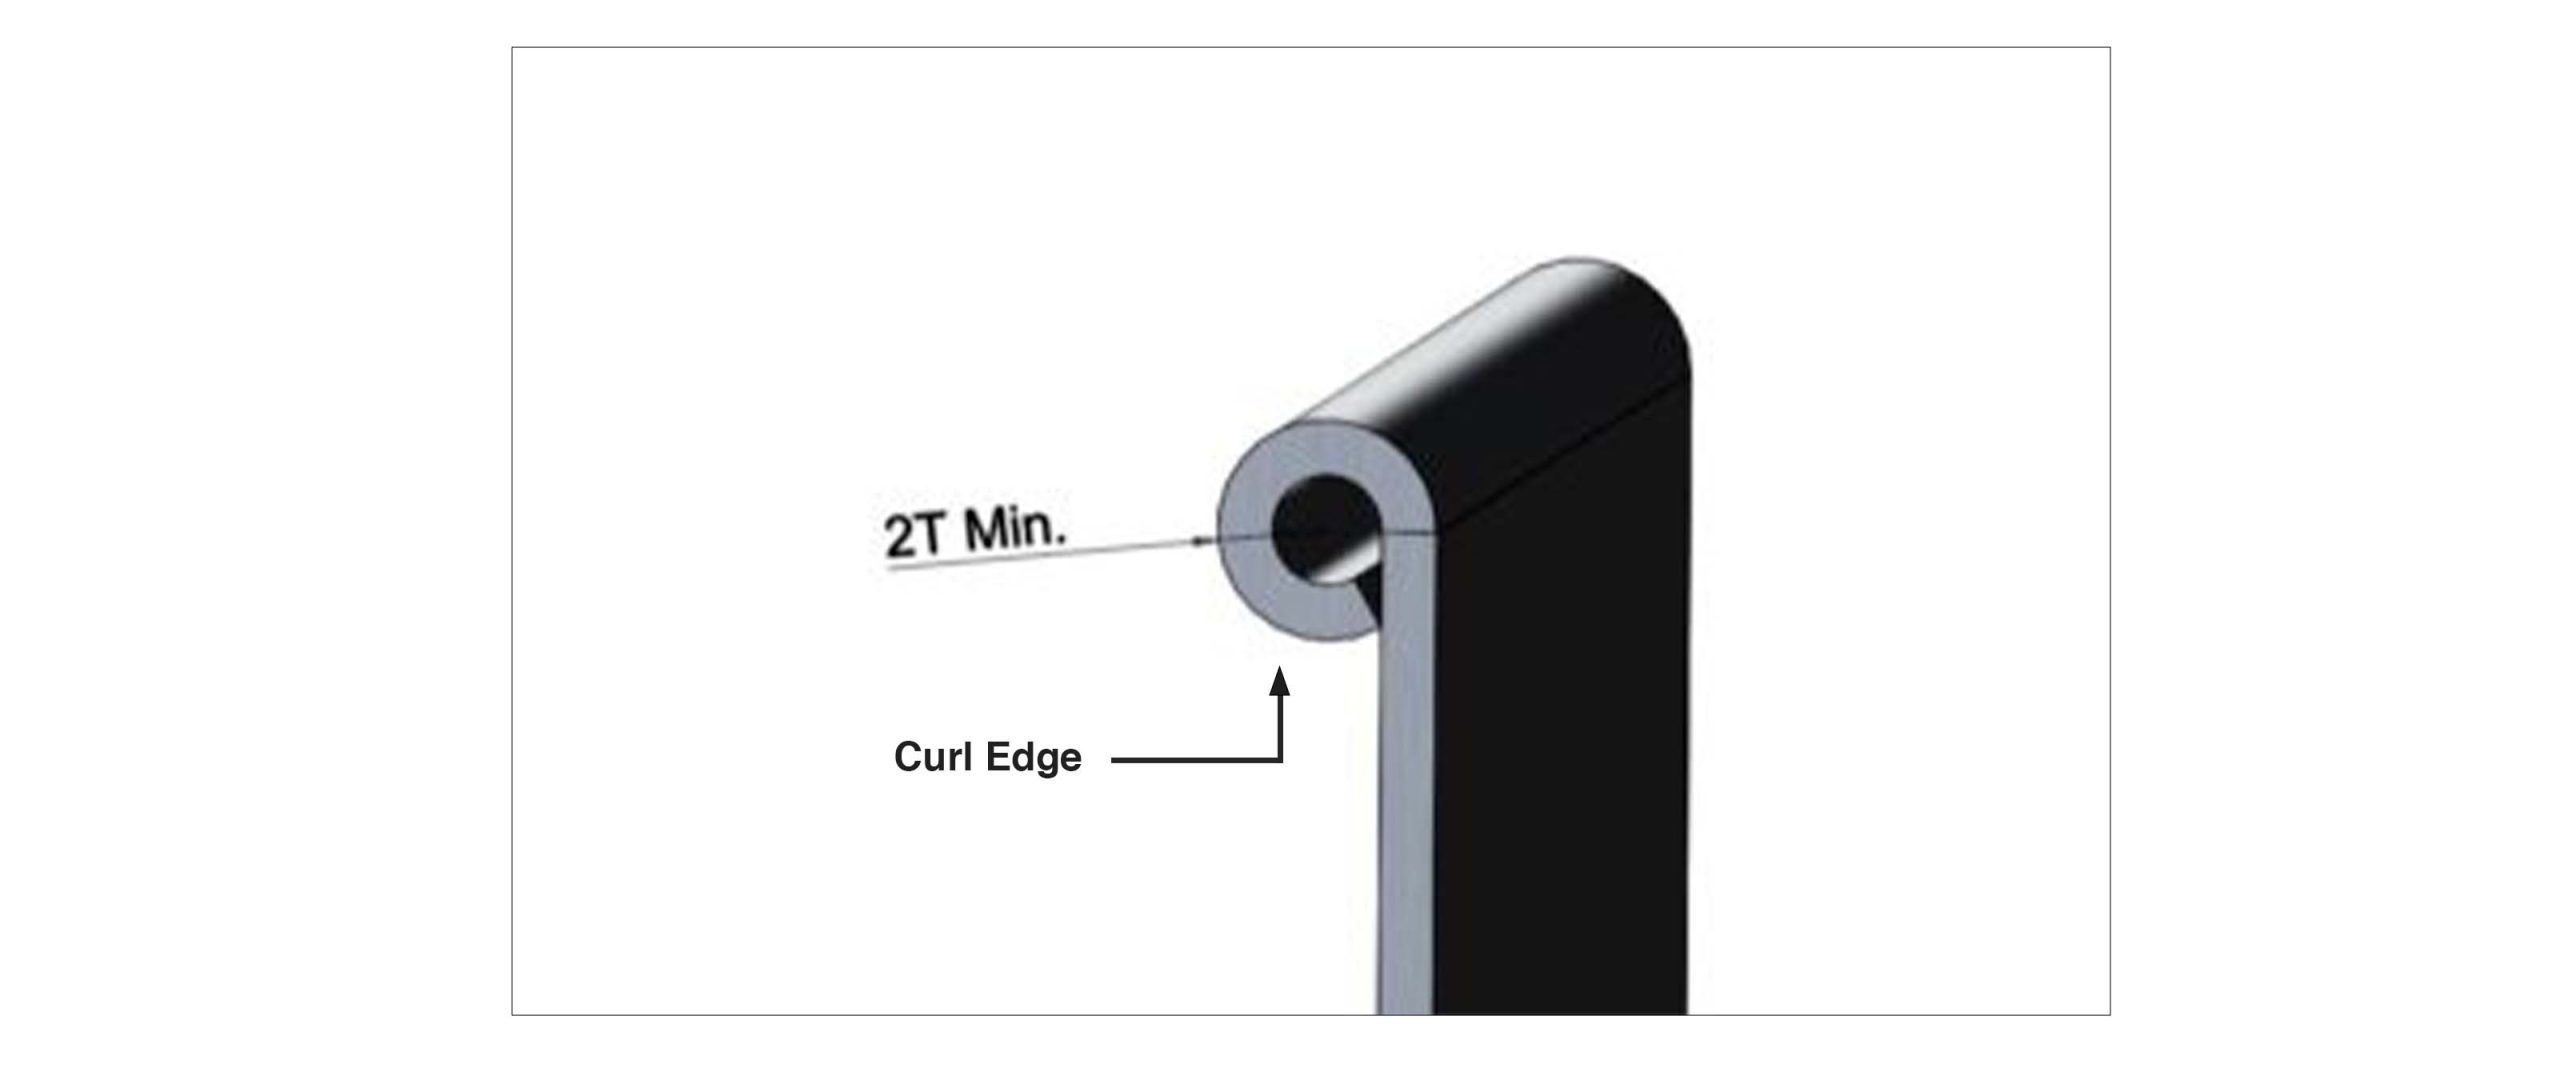
Curls are hollow circular rolls formed at the edge of the sheet via sheet metal bending. Curl features are commonly used to provide strength to a part and to remove sharp edges from the workpiece so that it is safe to handle.

For best results, it is recommended that the outer radius of a curl be at least twice the material thickness, although this will vary depending on the manufacturer and their tooling for curling. The bend should be at least the radius of the curl plus 6 times the material thickness from the curl feature
2. Hem edge guidelines
Hems are similar to curls — they are folds made back onto the metal itself — formed into a U shape. Hem features are commonly used to provide strength to the part and connect parts together. The three main types of hem features industrial and designers should be familiar with include: open hem, closed hem, and teardrop hem.


Example of how open hems can be used to connect two parts
1. Holes and slots positioned too close to bends
Holes and slots which are located close to bends are susceptible to deforming following bending. To ensure successful bending, it is recommended to place holes away from bends at a distance of at least 2.5 times the material’s thickness (T) plus the bend radius (R). For slots, it is recommended to position it at least 4 times the material’s thickness plus the bend radius away from the bend.

2. Holes and slots positioned too close to edge
Holes and slots located too near a part edge can result in a ‘bulging’ effect. Therefore, a good rule of thumb is to leave a minimum space of at least 2 times the thickness of the sheet between the extruded holes and the part edge.


Get a quote with HLH Rapid 24 to 48 hours or less
Standard sheet metal bending tolerances for reference:
| Feature | Tolerance |
| Forming or bending | ±0.508mm (0.020″) |
| Bend to hole or feature | ±0.254 mm (0.010″) |
| Bend to hole | ±0.381 mm (0.015″) |
| Bend to hardware | ±0.381 mm (0.015″) |
| Bend to edge | ±0.254 mm (0.010″) |
| Bend to bend | ±0.381 mm (0.015″) |
Source custom sheet metal prototypes and production parts with us from a wide range of metals, including sheet metal alloy, steel and stainless steel alloys, and copper alloys. Simply submit your 2D and 3D CAD drawings to our ‘get a quote’ form along with any project details including quantity, material or surface finishing requirements, and our engineering team will get back with a quote within 24 hours.
Explore Sheet Metal Services
